Showing posts with label dessert. Show all posts

Friday, 27 March 2020

Simple Carrot Cake

I think I baked this cake just so I could have cream cheese icing! I wasn't thinking about the orange carrot-y goodness or sweet local honey or the crunchy crushed walnuts. What I was thinking about was that creamy, tangy icing that makes any carrot cake complete (in my opinion).


Carrot cake with cream cheese icing.


My carrot cake craving began when I was leafing through an old copy of Backyard Farmer magazine, issue No. 12 to be precise. There was a recipe, submitted by Lisa Walker, for an 'As Simple As It Comes, But Oh So Delicious' Carrot Cake recipe from a cafe called Bruce's at Wynyard in Tasmania. I adjusted the recipe a bit, as I wanted to use spelt flours, so here's how I made it in my kitchen:

Simple Carrot Cake🥕

Ingredients:

1/3  cup brown sugar
1/2  cup wholemeal spelt flour
3/4 cup white spelt flour
2 teaspoons baking powder
1/2 teaspoon bicarb soda
2 teaspoons cinnamon
2 large carrots, peeled & grated (*I coarsely grated the carrot but think finely grating it would be best.)
1/3 cup chopped toasted walnuts

1/2  cup vegetable oil (*I used macadamia nut oil.)
3 large eggs
1/3 cup local honey

Method:

1.  Preheat oven to 170C.  Grease and line a cake tin.

2.  Whisk flours, baking powder, bicarb soda, cinnamon and sugar in large bowl.

3.  Blend oil, eggs and honey until creamy and frothy.

4.  Make well in centre of the dry ingredients. Pour in blended wet ingredients.

5.  Mix gently and, just before all the flour is incorporated, add in the grated carrot and 
     walnuts and finish combining cake batter. Do not overmix!

6.  Fill prepared cake tin with the cake batter. 

7.  Bake, on middle rack in the oven, for around 45mins. Cake should bounce back when lightly touched.


I didn't follow a recipe, like this one, for cream cheese icing. I simply beat together  1/2 tub of softened cream cheese,  a tablespoon or so of lemon juice and then added some spoonfuls of icing sugar until it tasted just right.


Wholesome ingredients.

This cake was oh so simple to make and it did taste oh so delicious....especially with that creamy, tangy cream cheese icing on top.


I've been thinking that I may just bake another carrot cake soon.  (After all, I do have half a tub of cream cheese left over so could make more icing.😉) Perhaps, I will try this recipe for the carrot cake that was judged to be Australia's Best. Apparently, the judges had a debate about whether carrot cake is really carrot cake without cream cheese icing! 

What do you think? Is carrot cake really carrot cake without cream cheese icing?

Meg

Saturday, 9 November 2019

Sweetness on Saturday

As the sky warms here today, and Saturday dawns, from my old verandah chair I watched and listened to daybreak. While the world was only half-awake, I thought of the many sweet and gentle joys in my life: from the way my almost-teenage son still lays his head upon my shoulder to the loving voice of my Mum on the phone; from the warm and happy hugs of dear friends to the generosity of a simple-living blogging community; from the soft yet insistent nudge of a Labrador's wet nose (when dinner is less than one-minute late!) to the creamy petals of a new Magnolia bloom unfurling. While I can hold some of these special things in my hands or capture them on camera, there are many that are tucked away in my heart.

Creamy magnolia petals and honeybee stripes. 
(Such a happy, buzzy bee!)

A slice of homemade birthday cheesecake. 🎂
(On my favourite plate!)

Twinkling lookout lights that sparkle across the night.

Handmade goodness that arrived in my mailbox.
(Thank you, Nana Chel and Judy.) Xx

The soft colours of orchids in my Mother's garden. 💛
(They remind me of a fading sunset.)

May there be some sweetness in your Saturday too. 

Meg Xx


Friday, 1 November 2019

Comforting Caramel Puddings

Puddings like these, which make their own sauce as they bake, are among my favourites. With a soft, cakey top and a sweet sauce that thickens and bubbles away underneath, they are warm, gooey and comfortingly delicious. Served with a dollop of naturally thick cream and they are even better!

Mmm ... sweet self-saucing caramel puddings. 

I made this version of a caramel self-saucing pudding for the first time recently. I followed Donna Hay's recipe but reduced the amount of sugar, in both the cake and the sauce, to lessen the sweetness somewhat. I also used spelt flour instead of plain flour as that is what I generally cook with. They still turned out beautifully!  Here's the recipe with my adjustments:


Self-Saucing Caramel Puddings
** not suitable for those with a nut allergy**

Cake Mix:
75g melted butter
1/4 cup brown sugar
2 eggs
1 cup almond meal 
1 cup white spelt flour
1 teaspoon baking powder
1/3 cup milk
1 teaspoon vanilla extract

Sauce:
50g butter
1 cup  brown sugar
1 1/2 cups water

1.  Preheat oven to 160C and lightly grease 6 x 250ml capacity ramekins.

2.  Make the sauce by putting butter, brown sugar and water into a saucepan. Stir over a 
     medium heat until butter is melted and sugar is dissolved. Set aside to cool while you 
     make the cake batter.

3.  Place all the cake mix ingredients into a large bowl and mix until well combined.

4.  Spoon cake mixture evenly into the six ramekins.

5.  Pour the caramel sauce over the top of each pudding (I transferred the sauce to a 
     heatproof jug and poured it very slowly over the back of a spoon and onto the top of each
     pudding.)

6.  Bake for 30mins.

7.  Allow puddings to stand, for at least 5-10minutes, to allow sauce time to thicken more.

8.  Serve with a big dollop of the freshest, thickest cream you can find:) 

While we've had some hot Summer-like days already this Spring, many nights have still been cooler so perfect for a warm and comforting pudding like this one. Its nutty sweetness and gooey sauce will see you scraping every last little bit you can out from your own little ramekin.

Have a lovely weekend!
Meg

p.s. I found my little ramekins at the local op-shop. The set cost me just a few dollars and I think they are as sweet as this pudding.


Wednesday, 5 September 2018

A Lovely Lemon Meringue Pie

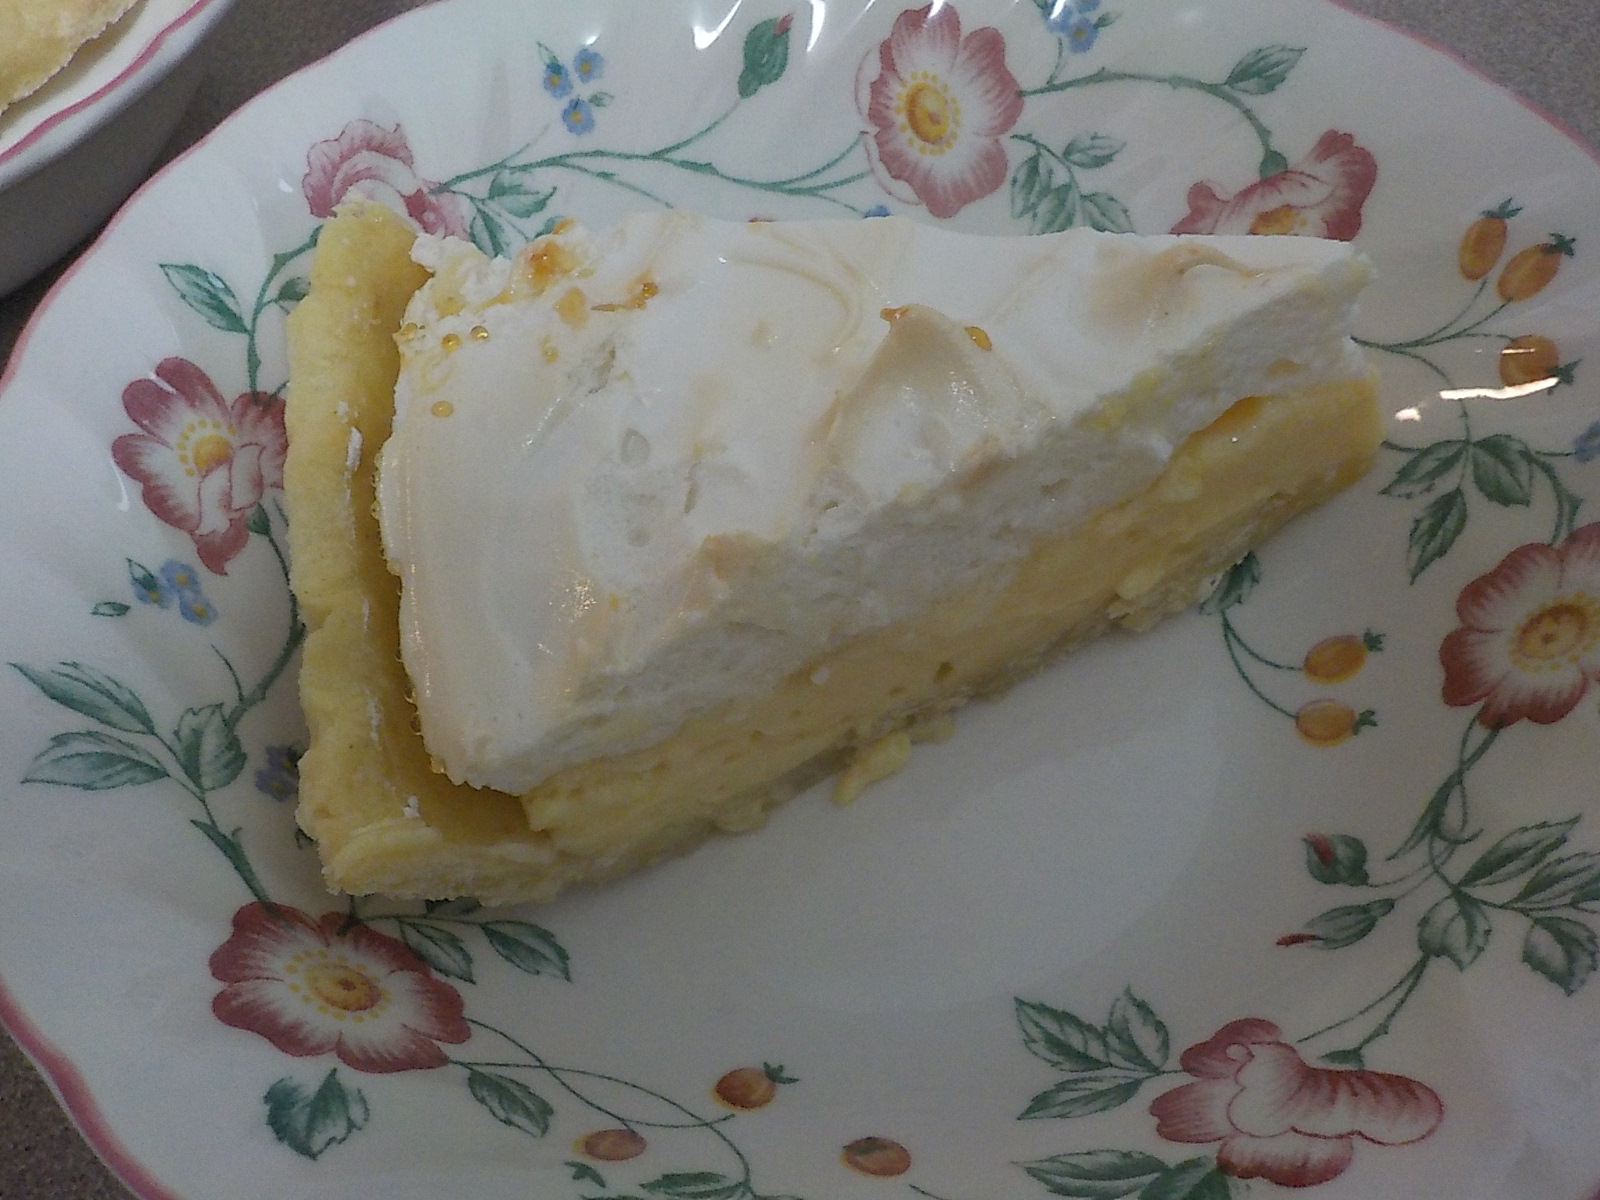
I couldn't remember the last time I'd had lemon meringue pie. A not-too-sweet pastry shell filled with a tangy lemon 'curd' and topped with glossy white meringue. Swoon! We used to have it on very special occasions when I was growing up but I would only have had it a handful of times since then. So, when Laura over at Grow Gather Enjoy mentioned the pie she made for her Dad recently, I decided that it had been way too long between slices! I made a lemon meringue pie that very day and it became dessert for our shared Fathers' Day dinner. My husband did notice the break in tradition from the usual cheesecake I always make him for his special days but the loveliness of tangy lemon with fluffy sweet meringue soon silenced any protest! 


A piece of oh-so-delicious pie!

My Mum made the filling for her lemon meringue pie with condensed milk, lemon juice and eggs. Lemony fillings thickened with cornflour just don't carry the same memories for me! A quick search and I discovered this simple recipe, contributed by Ruth Salecich-Brown, over at Love in a Little Black Diary, that her grandmother, Evelyn Proposch, used to make. It seems Ruth has fond memories of lemon meringue pies too!

So, I gathered all the basic ingredients and set about the baking of this lovely pie. It is quite easy to make and the recipe includes instructions for the easiest pastry I've ever made. No rubbing butter into flour! Here's how it came together in my kitchen:


Lemon Meringue Pie

For the Pastry:  Warm 60g butter, 2 Tablespoons sugar and 1/4 cup milk until butter just melted. Remove from heat and whisk in 1 beaten egg. Add 1 1/2 cups of self raising flour until a soft dough forms. Roll out dough on a floured surface or sheet of baking paper and then line your pie plate with it. Neaten the edge of your pie by trimming off any excess pastry. Prick carefully with a fork and then bake in a slow oven for 10-15mins until lightly browned. Cool before adding the filling.


 A quick & easy homemade pastry...

...forms a lovely little pie crust.


For the filling Beat 1 tin of condensed milk, 1/2cup of freshly squeezed lemon juice and 2 eggs yolk together until blended. Add to the baked pie shell.

Egg yolks, condensed milk & lemon juice ...

... make a luscious, tangy filling. 


For the meringueBeat two eggs whites until stiff peaks form. Very gradually add 4 Tablespoons of caster sugar and whisk until meringue is white and glossy. Spread meringue over the top of the pie's lemony filling. Bake in a slow oven (150C) until meringue is just beginning to brown. (My pie was ready after just 15mins in my oven.) 

Egg whites whipped with a little sugar for the glossy meringue ... 

 ... that tops off this sweet & citrus-y pie.

Ready to be sliced and shared.


With that lovely lemony filling waiting underneath that fluffy meringue, a layer of creamy yellow and glossy white, this is a pie that combines tangy with sweet in a mouth-watering way. I couldn't wait to try it! One bite and I remembered how wonderful a homemade lemon meringue pie tastes! Unfortunately though, there were no second helpings (probably just as well;) so I think I will have to make another again soon. Xx

Do you bake homemade pies?  What's your favourite?

Meg


Friday, 6 July 2018

Simple Chocolate Self Saucing Pudding

Winter, the season for pudding! Warm and delicious and homemade pudding. A self-saucing pudding is one where the layers of the pudding, the cake and the sauce, separate as the pudding cooks. The cakey part rises to the top while the sauce thickens underneath. I just love that, while baking in the oven, an amazing alchemy happens that turns some simple, basic ingredients into something so sublime!


Chocolate cake on top and a sweet sauce underneath.

This simple recipe, from well-known chef and Masterchef judge, Matt Preston, is apparently based on one found in an old cookbook. It's an oldie but a goodie!  Here are the basic steps:


Sift dry ingredients. 
(In this recipe all of the flour and half each of the sugar and cocoa.) 

Pour wet ingredients into the dry ingredients. 

Fold in gently to form chocolatey batter.

Sprinkle sugar and cocoa mix onto the top of the batter.

Pour boiling water carefully and gently over the top.
(I pour it very slowly over the back of a spoon.)

Bake in the oven.


Warm pudding and homemade ice-cream. Sublime!


A generous spoonful of chocolate self-saucing pudding, with its soft chocolate "cake" on top and its oozy chocolate sauce underneath, together with a dollop of fresh, thick cream or a scoop of vanilla ice-cream is just about as good as Winter gets. ❆

Have a lovely weekend.

Meg

p.s. Cheryl over at A Simply Good Life posted a recipe for a Lemony Self Saucing Pudding recently.  Such sweet temptations!


Friday, 9 February 2018

A Different Kind of Chocolate Cake

From a tin of red kidney beans, found floundering in the pantry and not quite out-of-date, came this scrumptious chocolate cake. Gluten free, moist, dark and chocolaty! The red kidney beans replace the flour one would normally incorporate into a cake batter. After it's been baked though, you'd never know!


Different but soooo good!

The recipe for this different kind of chocolate cake was developed by Sarah Wong over at Clever Cook.  I'm not sure what inspired her to make chocolate cake with red kidney beans ... perhaps she had a tin of these beans that needed using up too! She calls her creation the Magic Bean Cake. I think that's an apt description of the alchemy that happens while this cake bakes.  There's no trace of those kidney beans (and believe me, my son would soon uncover them if they were there).  

While her recipe is written for the Thermomix, it would be very easy to make this cake with a food processor. The red kidney beans just need to be whizzed up well with water, egg and vanilla until smooth. The butter and sugar can be creamed with a simple hand mixer or by hand. And a bowl and wooden spoon would work just as well for mixing in the dry ingredients.  Add a luscious icing, like this easy and velvety Chocolate Fudge Icing, and you have a cake worthy of doing birthday cake honours!

Adding the finishing touches!
(With candles it was even more special!)


I hope there's a piece of cake waiting for you somewhere in your weekend. I'd share a slice of this one with you but the only evidence left by birthday boy and his friends were their smiles ... and a few crumbs!

Meg


Wednesday, 6 September 2017

"Cheesecake" Sponge

Creamy, sweet "cheesecake" on top and light, airy sponge cake underneath makes for a divine dessert! 

A very special treat!

This is one of those recipes that I left home with; scribbled down on a scrap piece of paper and tucked into an old folder that was, at that time, my recipe book. I've been making it for special occasions ever since though I don't know why it's called a cheesecake when there is no cheese in it at all!

Homemade sponge cake for the base. 

For the sponge:

Grease and line a springform pan. Preheat your oven to 180C. Beat two eggs until thick and creamy. Gradually add 1/3cup caster sugar while beating until sugar dissolved. Gently fold in 2Tablespoons each of plain flour, self raising flour and cornflour. Spoon mixture into prepared pan and spread evenly over base. Bake for 20mins. Turn out cake and cool on a wire rack but return to your re-lined springform pan when you are ready to pour topping on.

 Smooth, lemony "cheesecake" mixture.

For the "cheesecake" topping:

Beat 300mL of a thick cream until soft peaks form. Fold in one tin of condensed milk and then generous 1/4cup of lemon juice. *Topping should thicken as you fold in the lemon juice.* Pour over the cooled sponge base and smooth out evenly. Carefully cover the top of the springform pan with a plate and place in fridge for topping to set which takes several hours.

 One on top of the other!

Ready to set in the fridge.

Once your "cheesecake" sponge is ready, after you've removed the side of your springform pan and lining paper, you should be able to carefully slide it onto a serving plate with the aid of an egg flip or two. 

You can jazz up its creamy topping with fresh fruit like berries or passionfruit which have a tang that balances out the sweetness of this dessert. When I made it for Fathers' Day last weekend, I popped some little raspberries on top and served it with a dollop of homemade passionfruit butter.  A small slice is plenty but you might want to hide any leftovers!

Do you have a dessert that you save for special occasions at your place?

Meg

p.s. Over on her Down to Earth blog, Rhonda has a recipe for making your own condensed milk at home. 

Monday, 5 June 2017

Winter's Apple Crumble

The weather is Wintery now, cold mornings followed by crisp, clear days and ending with chilly nights that are forecast by the high pink glow of evening skies.  We close the house up early, rug up in our woolly layers and warm ourselves with nourishing comfort foods.

This simple apple crumble is one of those lovely comfort foods I make regularly in Winter. It's delicious served with a big dollop of thick jersey cream or homemade custard and eaten while warming one's hands around the bowl. 

A warming homemade apple crumble.

This version of apple crumble comes from the recipe book, Australian Lifestyle Cookbook, that my mother gave me way back in 1992. I have made it more times than I can count and it remains a favourite. 

Just baked!

While the original recipe uses a 450g tin of pie apples, I make my own stewed apples for it. This time, I used some tart granny smith apples that had been discounted due to a few bumps and bruises. With a sprinkle of sugar and a pinch or three of cinnamon, they were just a good as unblemished apples.

Apple Crumble

                 For the stewed apples:                                                 For the crumble:
                5 large Granny Smith apples                                       3/4 cup plain or spelt flour
                1/4 cup filtered water                                                    3/4 cup powdered milk              
                1 Tablespoon raw sugar                                                90g softened butter
                1 teaspoon cinnamon                                                    1/2 cup coconut or brown sugar

How to make the stewed apple:
1.  Peel, core and thinly slice Granny Smith apples and put into a saucepan.
2.  Add water, sugar and cinnamon to apples and stir to combine.
3.  Place lid on saucepan and heat gently until apples are soft. Stir occasionally.
4.  Take off heat and allow to cool.

How to make the crumble:
1.  Mix flour, powdered milk and sugar together in a bowl.
2.  Cut softened butter into little cubes and put it into the bowl too.
3.  Rub the butter into the dry ingredients using the tips of your fingers until the mixture
     resembles fine breadcrumbs.

Then ...

Grease a mid-size oven proof dish. Spread stewed apples evenly over the base of the dish. Spread the crumble mixture over the top of the stewed apple. Bake in a moderate oven until golden brown. Mmm....

Sometimes, I add finely chopped walnuts to the crumble mix or coconut. You can add sultanas to the stewed apple if you wish too. However you make it though, I hope it warms your tummy and your heart on a cold Winter's night.

Meg


Friday, 14 April 2017

Teacup Maple Syrup Puddings (Microwave)

Autumnal nights, crisp and cool, are perfect for puddings. And, a sweet & saucy pudding, in a teacup, not only warms your heart but your hands too as you wrap them around your chosen mug (after it's cooled down to a safe hold-able temperature, that is).

A sweet and warm teacup pudding with a dollop of cream.

I only acquired a microwave a short time ago. I typically use it just for reheating leftovers but occasionally, I'll make these little puddings. The original recipe, for a Butterscotch version, comes from Lucy at Bake.Play.Smile.  As is my way though, I have tinkered with the recipe a little and toned down the sweetness a lot in the process. This is how I make them at my place:  

Teacup Maple Syrup Puddings

CAKE:                                                                SAUCE:
100g butter                                                       1&1/2 cups boiling water
1 egg                                                                   1Tablespoon cornflour
1/2 cup milk                                                      2 Tablespoons maple syrup
1 teaspoon vanilla extract                              1/4 cup coconut sugar
2 Tablespoons maple syrup                           thick cream for serving*
1/2 cup SR flour 


 Melt butter in your microwave.

 Whisk in milk, egg, vanilla & maple syrup.

Blend in flour by whisking gently.

 Divide the batter evenly to half-fill greased teacups.
(Recipe makes six.)

 Mix cornflour & coconut sugar together in a heatproof jug. 
Whisk in boiling water and maple syrup.

Pour sauce from heatproof jug very carefully over the top of the cake batter in each cup.
(Pouring the sauce over the back of a spoon helps:)

 Place cups (three at a time) on microwave plate & cook for 2minutes.
 Tops of puddings should be firm and a little springy. Cook further 30seconds if required.

During the cooking time, the teacups become quite hot so you need to be very careful when handling them. Allow each cup/pudding to cool before serving so that they merely warm the hands that hold them (rather than burning them).

A beautiful sauce forms underneath the cakey top during cooking.

If you would like to serve these with white chocolate chips, jersey caramels and/or ice-cream, as is Lucy's tempting suggestion, then you can. I just dollop a lovely scoop of thick cream on top before I sit myself down to savour spoonfuls of warm and gooey pudding. Delicious!

Do you have a favourite pudding recipe that you like to make? 

Meg


Wednesday, 4 January 2017

Berry Delicious Somethings

When I tiptoed out to the kitchen early yesterday morning, a wee bit sleepy but looking forward to a couple of quiet hours to myself before anyone else awoke, I stood in a should-not-be-there puddle right in front of our combined fridge/freezer. A puddle, as it turns out, that was the handiwork of a little elf. It seems that this cute elf got a bit peckish the previous evening and rummaged around in the freezer for some sliced bread to make himself some toast. Unfortunately, said elf left the bottom freezer door slightly ajar and it remained so all night long. And it was a warm night too! By morning, when I wandered out in my pjs, the freezer had defrosted and all the food in the fridge above (which is cooled by air circulating up from the freezer below) had warmed right up. I almost turned around and went back to bed!  Instead, I set about salvaging what I could.

In this freezer, which is thankfully not where I keep the bulk of our frozen foods, I had a stockpile of frozen berries. Some blueberries from my own blueberry bushes and some packets of mixed berries. All defrosted berries now! So, I made a quick dash to the little local shop (which thankfully opens early:) to buy some essentials and then set to making some berry delicious somethings...

Buttermilk and Berry Slice
(I used this recipe but with a pecan topping instead of almonds.)

Berry good!

Blueberry and White Chocolate Muffins
(Adapted from this recipe from Jude Blereau.)

 Mixed Berry Icecream made in the Thermomix
(Adapted from this recipe for Strawberry Icecream)

Berry delicious!

Now, instead of plain old toast for a hungry little elf, there are several batches of these berry delicious somethings in the freezer. Hopefully, after he reaches in to find something to quieten his tummy rumblings, he'll remember to shut the freezer door!

Meg