Monday, 27 February 2017

Pretty Picot Edge Washcloth

A washcloth with a fancy edge has been a favoured project of late.  Knitted up in a creamy, organic cotton, this simple soft washcloth with its decorative edge will make a lovely little gift.

 Picot Edge Washcloth & Soap

I found the pattern I used on the Churchmouse Yarns website in their Wee Ones pattern library.  It was not a free download and cost $6AUS. I purchased it because it looked lovely and seemed simple and the pattern can be made up into a baby's blanket easily. (This is not a sponsored recommendation, I just bought the pattern and happily and successfully knitted it up:)

I developed a few new knitting moves as I made this washcloth. This You-tube clip, for the Knitted Cast-on Method, helped me learn a new-to-me technique that is different to how I would normally get the beginning stitches on my needle. I also found this You-tube clip, for making a Picot Edge, really helped me visualise how to create that decorative edging.  

Picot Edging

While much of this washcloth is simple plain knitting, I think the picot edge is very pretty and makes it just that little bit special.

Meg


Saturday, 25 February 2017

A Garden Visitor 9

The distinctive 'whistle' of a beautiful Australian parrot often alerts us to its presence. We hear the King Parrot well before we see its vivid red and contrasting green feathers in amongst the silvery foliage of the olive trees that overhang our fence line. They come to feast, of course, on the ripening olive fruit. A free lunch!

 A male Australian King Parrot with an olive in its beak.

Such pretty plumage!

The male King Parrot is easily spotted because of the vibrant red feathers that cover his head and breast. The female's head and wings are of a brighter green but she still has that flash of vivid red too. 

 A female King Parrot perches in the Plane Trees.

 Nestled in among leaves of the trees.

It is a true joy to see these parrots in our garden. My photos, somewhat grainy today, don't do their colours justice so if you would like to see them in all their finery, and read a little more about them, you can visit this link to the Birds in Backyards page. (I hope to be able to capture clearer photos of them before the olives finish fruiting but they seem to sense when I'm near and fly off with their loud screeches echoing over the ridge.)

These stunning birds have been regular visitors to our garden over the last few weeks. Whenever we hear their 'whistles' on the wind, we rush out onto the verandah to see if we can catch a glimpse of these beautifully feathered friends. More often than not, they are in the olive trees!

Meg 


Monday, 20 February 2017

Making a Start on Subtraction

Like many people, I've accumulated a lot of material "stuff" over the course of my forty-something years.  In that way, I don't think I'm much different to a lot of other people my age who live in relative wealth in a prosperous, first-world country. I don't think I'm alone either in feeling the burdens of some of this superfluous stuff. 

The oppostite process to the accumulation of stuff is the subtraction of it. I'm not sure where I first read about the idea of subtraction. Not the mathematical operation that leads to a lesser total, but the minimalist concept that leads you to more. To me, the mindset of "less is more" could lead to some very worthwhile equations like these: 

* less to clean/less shopping for even more stuff  =  more time
*less stuff taking up room in your house/life  = more space
*less money spent buying 'unnecessary' stuff  =  more money
*less stuff to keep clean and to worry about = more energy (physical and mental)
*less confusion about what is really important = more clarity
*less need to accumulate/consume even more = more contentment with what one has

+++++++++

So, like fellow bloggers before me (Cheryl over at A Simply Good Life, Chris at Gully Grove and Fiona at Stay Home Instead), I have begun that process of subtracting unnecessary stuff from our home and my life. Rather than beginning with whole rooms , I began with a single drawer in my kitchen:

Before
(What a mess!)

Sorted 
(The things I decided to keep.)

After.
(Much better!)

I thought carefully about every item in that drawer. Was it broken? When was the last time I used it? Did I use it often/at all?  Did I have another one lurking somewhere? Could I re-purpose it somehow so that it would become useful? Anything that didn't "pass muster" (extra cookie cutters, melon baller, coasters and the like) went into a box for the op-shop  destined, hopefully, to become useful to somebody else. 

The challenge now is to continue this subtraction and not to accumulate any more. There are many more drawers, cupboards, bookshelves and closets to do. Given that I can be prone to procrastination with most bigger projects, I find the most important thing is to make a start ... and then just keep going!

Are you undertaking some subtraction yourself?

Meg


Thursday, 16 February 2017

Little Apricot and Coconut Balls

There are just three ingredients in these sweet, simple and delicious apricot and coconut balls. 

Simple, homemade and delicious!

All you need is some soft and juicy dried apricots, coconut and honey. This is the recipe that I used. It appealed to me because honey was the additional sweetener and not icing sugar which featured in a lot of other recipes I found for apricot logs or apricot balls. I also used dessicated coconut instead of shredded coconut because that is what I had on hand. They are so easy to make:

Put 1 1/2 cups dried apricots, 1/2 cup dessicated coconut & 1 Tablespoon honey in food processor.

Blitz until apricots & coconut are blended together thoroughly.

Shape teaspoonfuls of apricot & coconut mixture into little balls with wet hands.  
Roll in the extra coconut. Chill & store in fridge.

These little balls of apricot-y goodness are so simple, so easy and so delicious. It is so hard to stop at just one though...so you might want to double the recipe!

Meg


Tuesday, 14 February 2017

Scenes from a Scorcher

Today, an overcast sky and a gentle breeze offer a welcome contrast to the sweltering temperatures from the latest heatwave of our Summer. Days on end of high temperatures seems to be the way of things this season, so when a cooler day comes along, it dawns with something akin to blessed relief.

The extremely hot conditions over the weekend just past kept us inside most of the time. It reached 43C in the shade of our covered deck, shadecloth blinds down, on Sunday. It was 40C at 10:30 in the morning! Had we put the thermometer out in the sun, that needle would've nudged way higher. 

Our heatwave days looked like this:


The hot Summer sun rises out beyond our back deck. 

The temperature reached 40C on our shaded deck at 10:30a.m. Sunday morning.

Early morning sprinkler watering the avocado tree.

Keeping the water up to salad greens like lettuce. 

Skinks, like this one, were active in the garden.

 An old bedsheet to shade our native bee hives.
(Before we secured it.)

Simple foods/meals were prepared without adding extra heat. 
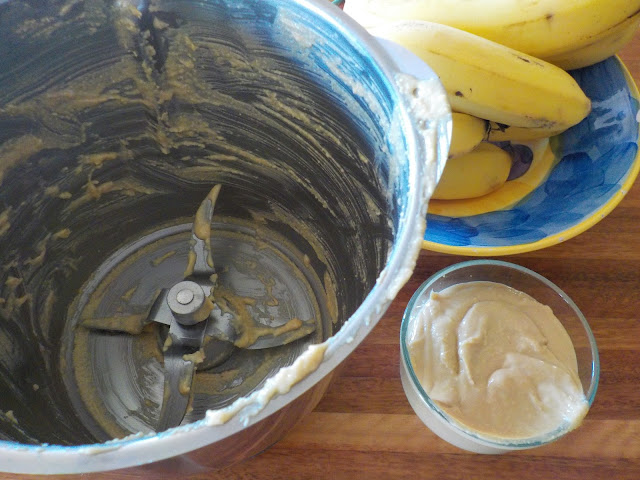
(Homemade peanut butter.)

Reading books and watching a movie were our afternoon activities.
(All borrowed from our local library...free!)

Refreshing, homemade treats like these were essential!


Heatwaves do thankfully come to an end though the temperature is set climb again throughout the week here. Think I'll need to make more of those icepops for next weekend!

Have you been experiencing weather extremes where you live? How do you prepare for them? 

Meg


Friday, 10 February 2017

Here & Now 9

Here & Now it is hot and it will be scorchingly so for quite a few more days to come. While it would be easy to wish this season of heatwaves away, I am trying to work with the challenges of the season while waiting patiently for the Autumn to come.

The creamy, fragrant Summer blooms of Frangipani.

Sweet, little homemade apricot and coconut balls.

A fresh, nutritious pasta salad.

 An orchid in bloom on a battered old table.

Loving //  The Summer scent of Frangipani wafting indoors from our neighbour's tree.
Eating //   Healthy salads with spinach or broccoli for extra nutrition.
Drinking // Jugs full of cold, icy water with or without slices of lemon.
Feeling //  Grateful for the solar panels on our roof that offset some of our Summer energy costs.
Making //  Homemade goodies in the kitchen.
Thinking //  "This Summer could go on for a long while yet!"
Dreaming //   Of long alpine walks in cooler climes.

I wonder what your here & now is like, wherever you live? If you'd like to share, you can join in with Sarah, over at Say! Little Hen  like I have done. She hosts this short but sweet link-up each month.

Meg


Monday, 6 February 2017

Marinated Feta

Feta cheese, marinated with lemon and herbs in olive oil, a little rock salt and some black peppercorns...soft, creamy and delicious!


 A jar of delicious marinated feta.

adore marinated feta. I love the beautiful array of flavours ~ herbs, chilli, lemon, garlic, sun-dried tomato, capers, olive ~ that surround the cheese and infuse into the oil. I love its versatility; crumbled in a salad, melted within a breakfast omelette, topping a slice of fresh bread spread with chunky avocado (Aren't avocado and feta a match made in heaven?) or a piece just popped into one's mouth on the way past the fridge. Sigh!

Marinated feta can be expensive to buy but it's so easy and quick to make at home. There are so many different combinations for delicious marinades but I made mine, for the feta I bought at a deli, with fresh herbs from my garden and the zest of an organic lemon.


Feta with the lemon, rosemary, thyme, salt & peppercorns that will flavour the olive oil.

Layer cubes of the feta with herbs, lemon zest, salt & pepper in a clean glass jar.
(I put a glug of olive oil in the bottom before I put the first layer of feta in.)

Continue making layers of feta, herbs, lemon & seasoning then cover completely with oil.
(I used extra virgin olive oil.)

Seal jars and place them in the fridge. Leave overnight for the flavours to develop.
(Eat within use by date of your feta...but mine never lasts that long!)

If you'd like to make your own marinades for feta cheese, here are some flavourful links:


Herb mix for marinated feta that features dried herbs


When every last cube of feta has been enjoyed, you can use the fragrant oil to make a salad dressing.  Just whisk some of the fragrant oil with a little lemon juice, a touch of mustard, a little honey or sugar and maybe an extra twist of salt and pepper. 

If you love feta and you haven't made your own marinade for it before, I hope you'll try it. The flavours are simply divine!

Meg

p.s.  A jar of marinated feta makes a very delicious gift too!


Thursday, 2 February 2017

Who's Been Digging in My Yard?

The first clue that something was digging in our garden was the poor upturned native raspberry bush that looked like it had been scratched out of the ground. The second clue was the distinct scratching noise coming from up the back near the magnolia. A third clue wasn't needed because I found the culprit. An Australian Brush-turkey chick!

Brush Turkey chick up a tree.

We see Brush-turkeys (or Scrub Turkeys as they are sometimes called) often around here. Their huge leaf litter mounds, raked up for the female to lay her eggs in, are a common sight along the paths we walk in our neighbourhood. Those impressive mounds are quite the feat; keeping eggs at a constant temperature thanks to the efforts of the male bird. 

Impressive Brush-turkey mound in the park near our house.

Once those eggs have hatched though, the chicks are to fend for themselves. This Brush-turkey chick was doing that quite efficiently, scratching at the ground with quite long claws, and pecking up tasty morsels.  When it felt we were getting a bit too close though, it flew up into our neighbour's lilly pilly hedge. 

The adult male Brush-turkey. 
(The owner of that impressive mound in the park.)

Australian Brush-turkeys are protected native birds. They can do a fair bit of damage in a garden with all their raking and scratching so we are hoping this chick doesn't decide to live here permanently. There are things one can do, such as laying wire mesh down under mulch, to try to deter them  but once a Brush-turkey has decided to build a nest in your yard, they can be pretty persistent. 

We haven't seen this little chick since it flew up into the hedge but I'm keeping an eye out for tell-tale signs of its presence! 

Meg